Showing posts with label Meetha/Sweets. Show all posts

Sunday, October 26, 2008

D I W A L I G R E E T I N G S ..............

Wishing all the readers of As Dear As Salt a very Happy and Joyous Diwali...........
.
.
Here are a few snacks/dishes that you may like to try this festive season......
.

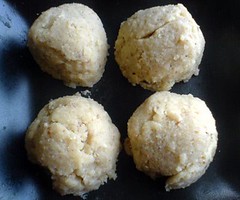
Dates and Pistachio Poli
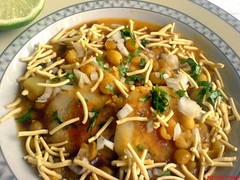
Ragada Patties


Badam no Seero


Sweet Potato Paratha

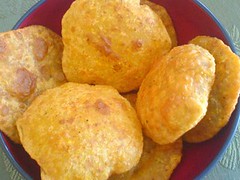
Matthi Puri


See you all after a short break!

Monday, May 19, 2008

Almond, M A P L E and Cardamom 'Pots de Creme' (sugarless)


The brain was in overdrive, as it always is, in anticipation of creating new & exciting dishes :)
.
I was thinking 'Pots de Creme'! With such an appealing name it was not a tough choice at all. I managed to plug in all kinds of substitutions possible and the results were SWEET....and SMOOTH ;)
.
Pots de Creme refers to both the custard dessert as well as the small lidded pots that this dessert is served in. Pots de Creme or Pots-au-creme translates from French to English as 'pot of cream'. It is basically a kind of custard made with egg yolks and then baked in a bain marie/water bath. You may click on the link above for it's origin and some fancy shamancy pots collection ;)
.
Almond paste is what I thought of for the custard, having had a gorgeous experience with it sometime back. How about maple syrup take the place of sugar, cried out the forever sugar replacer in me. Now in my books, addition of cardamom/elaichi to any sweets makes it absolutely thrilling and takes it over the top, so that had to go in too :)
.
Almond, Maple and Cardamom Pots de Creme
.
2 cups milk
3/4 cup almonds soaked 3hrs, up to overnight
1/2 tsp ground cardamom/elaichi (use as per your taste)
4 tbsp maple syrup (use as per your liking, I do not like cloyingly sweet creations)
.
1. Bring milk to a boil and simmer for half an hour.
2. In the meanwhile blend soaked almonds(de-skin) to a fine paste, use milk to facilitate the blender.
3. Add the almond paste to the milk & cook a few minutes.
4. Add maple syrup and ground cardamom & switch off the gas in 5 minutes.
5. Pour into individual ramekins, cover with a foil and bake at 350 for 15-20 minutes till set. Covering the ramekins avoids a skin forming atop the milk.
6. Enjoy a healthy and sugar free dessert, we loved it :)
.
Notes:
If your milk mixture does not thicken well, you can add some thickener like arrowroot powder etc to help thicken it faster.
Maple syrup sweetens the dessert very well and has additional advantage of nutrients. As for the GI, you may check it's level if you have any problems in that field.
Almonds impart a beautiful nutty taste, you almost don't want to mask their taste with too much sweetness.Purists may not take swiftly to my using the name for this dessert, but since when has that stopped me ....lol
.
So, how do you use your maple syrup? do lemme' know in the comments section!
.

Thursday, April 3, 2008

Time To Reveal The Mystery Ingredient --- Apple & Apricot Halwa

Apple and Apricot Halwa!
.
I gave it a fancier name by shaping the halwa into apple like figurines - Apple & Apricot Apples, oiii
Many Thanks are in order to all who played along, with their guesses. Pistachio was easily identified by many of you. Rava/Semolina/Sooji got the maximum votes for the main ingredient. The ingredient in the depression of the sweet was guessed as some kind of jam/fruit puree.
Well, no one guessed the right ingredient, Apple!!!
.
It is Apple & Apricot Halwa and uses just a teaspoon of sugar!
This was totally a spur of the moment creation of mine. A pretty jar of bright orange organic apricot preserves sat on my counter top for quite some time. I glanced at it every time I cooked but had to stick to my resolution of not opening it until I finished the other preserves languishing in the refrigerator ;) Yeah, looking at my pantry bursting at it's seams, there were some immediate steps that I needed to take, like displaying some jars on my counter top...lol
Secretly, I wanted to eat spoonfuls right out of that jar, but sense prevailed and I concocted this delicious dish which I'm really very excited and happy about, glad to share it with you all. It's going to be a regular at my place henceforth. The apples from the fruit basket helped me along. I had seen this delicious apple halwa amongst other drool worthy dishes over at Shilpa's and was thinking of trying it and then this idea took shape.......... Apples and apricots go extremely well together.
.
.
3 apples grated ( I used golden del)
1 tsp ghee
1 tbsp milk powder
1 heaped tsp organic raw sugar
1.5 tbsp organic Apricot preserve (I used reduced sugar)
1/4 tsp ground cardamom/elaichi
.
1. Heat ghee. Add grated apples and saute till water evaporates, about 10 minutes.
2. Add milk powder and stir till it all comes together in one mass.
3. Add sugar and let it mix well. The mixture will loosen a bit and then come together again.
4. Add the apricot preserves and cardamom, mix well. Saute a bit and switch off the stove.
5. Let cool a bit and enjoy a guilt free dessert. It is something that can be whipped up in a jiffy. It has a lovely sweet and a lil' tart taste from the apricot which is a pleasure to the senses. You can adjust the sugar as per your taste. If you want it fancier, make small peda/balls out of it, add some preserve in the depression on top of the peda & garnish with Pistachio. Milk powder can be replaced with ground almonds. I'm not sure if my mind was playing games with me, but it tasted just like dudhi/bottle gourd halwa :) Please note that this halwa does not have a cloyingly sweet taste, it is just too delicious!
Enjoy!!
.
p.s. ever tried jack cheese with apricot preserves? sweeeeeeeeet :)
.
.
Have you checked out my Dates & Pistachio Poli

Monday, March 31, 2008

F I G and H O N E Y G E L A T O AND Lemongrass Ginger Ale


One of the fruits that I miss dearly from back home is fresh, juicy, luscious fig! The others being guava, custard apple and chikoo! My standard for these fruits is exceptionally high, only because we had these trees at home and nothing can beat the joy of eating a fruit right off the plant ;) Of course, as a kid I never envisioned that these golden moments would become just a distant memory!
Anyway, back to the fig....
The beautiful conglomeration of colors,
the sweet, smooth and plump flesh,
the delicate velvety peel,
the crunch of seeds within.....
what's not to like?
.
So, what do you do if you like something and can't lay your hands on it? Go to the next best alternative is what I did, got the dried ones :) I like the black figs for their gorgeous taste and absolutely breath taking color! Fig Shake makes a regular appearance at my place, could ice cream and gelato be far behind ;)


.
F I G and H O N E Y G E L A T O
a must for fig lovers..........
.
1 heaped cup dry figs chopped fine
1/2 C milk
2-3 tbsp mascarpone cheese
1 tbsp honey
1 tbsp sugar, this is on the lower side (but tastes perfect to me), please adjust as per taste
a pinch sea salt
1/2 tsp orange zest
.
1. To plump up the dry figs, layer finely chopped figs with about 2tbsp water and the sugar that you will be using and let soak 4hrs or overnite. It can be done without soaking too, just takes longer to cook.

2. In a sauce pan heat figs sugar mixture till thick and the figs melt and the mix is bubbly.

3. Remove from heat and stir in milk, honey, orange zest, mascarpone and salt. Chill about 30 mins in the refrigerator and then freeze till set. I just froze it in a steel container with a fitted lid. You can use your ice cream maker if you have one. It froze within an hour on the quick freeze shelf of my refrigerator. If the mix is too coarse, you may blend it as per your liking.

4. For the gelato, the consistency is a little on the smooth side as compared to ice cream. The difference between ice cream and gelato is that cream is not added to the gelato.


5. Enjoy Fig and Honey Gelato, it is quick to make and tastes out of this world ;) So if you are a fig lover, a mascarpone admirer or, what the heck(!) just like to indulge in good food, get to your kitchen and start cooking. If you are at err... work, take a print out and get to it as soon as you reach home, yes it is THAT good :) I would like to submit this to the Tasty Tools event, microplane being the selected tool. Recipe adapted from here.


I'm glad I'm just about to make it for Sig's MBP-Mixed Drinks event with Lemongrass Ginger Ale! Lately I've not been able to get to the events ;)
.
Lemongrass tea is absolutely my favorite kind of tea :) Back home lemongrass used to grow wild in our backyard, now I've to pay dearly to get about 4 stalks of this herb! When I saw this Lemongrass Ginger Ale at Jaden's I knew I had to try it, though it was peak winter!! Try, I did and it was beautiful, just as I had expected. I might have gone a little overboard on the ginger, 'coz that took over the flavor. You can adjust the sugar as per your taste.
.

Enjoy, summer is not too far away........

Monday, December 17, 2007

Skinny Banana Pancakes with Walnut & Mascarpone Cheese Topping


Skinny, because I can't flip the other kind...lol!
.
My friends think I'm lucky that frosted cakes or cream and sugar decorations don't tempt my fancy. Though I like to spend time admiring those kinds of edible works of art, I can't seem to cajole myself to eat more than a bite of them, I like 'em plain.

But Mascarpone is another story :) I like to keep a container of Mascarpone cheese with me at all times, if possible ;) It is something that I enjoy, and yes I know it is 75% fat or something like that :) Purists may scoff at my use of Mascarpone, but I'll let you in on a food secret of mine, after all, my blog, my rules ;) I like to have blob of mascarpone with some sugar as my quick shrikhand fix....lol! I find it too irresistible :)


In this recipe I've mixed up mascarpone with some sugar and ground walnuts.......trust me on this one, try it and lemme' know ;)
.
Skinny Banana Pancakes with Walnut & Mascarpone Cheese Topping

Banana Pancake
1/3 cup all purpose flour / maida
1/3 cup whole wheat flour
2 tbsp semolina/sooji
2 bananas, mashed
2 tsp walnut powder
buttermilk to make the mix
1/2 tsp elaichi/cardamom powder
1/2 tsp baking soda/Eno fruit salt
pinch salt
Oil for shallow frying
.
1. Mix all to get a pouring consistency like a regular pancake.
2. Heat a griddle and spray some oil.
3. Pour 1/3rd cup of the mix and swirl the pan to spread the batter.
4. After 3/4 minutes flip the pancake and drizzle oil around the edges and cook till done.
5. Make all pancakes.
.
Walnut Mascarpone Topping
.
4 tbsp mascarpone (OR as per your liking)
2 tbsp walnut powder (coarse)
1 tbsp sugar (as per taste)
.
Mix all.
.
To serve:
Serve Banana Pancakes with a dollop of Walnut Mascarpone topping!
Enjoy...


So, how do you like your Mascarpone cheese? :)

Monday, November 19, 2007

Pumpkin, Date & Walnut Halwa aka Kaddu, Khajur aur Akhrote ka Halwa


I can write about the pumpkin being in season and how it is all over the market, and is just the right time for a pumpkin recipe!

Or, I can regale my childhood stories about how I had a pumpkin patch and about the harvest that we had every year!

May be I can charm you with the nutritional properties of orange colored vegetables. But no.
I will just get right to the recipe and the pictures... :)


Pumpkin Date Walnut Halwa
.
1 cup grated pumpkin (I used a butternut squash)
1/2 cup dates
1/4 cup walnut, coarsely powdered
1/2 tsp elaichi/cardamom powder
2 tbsp + 1tsp ghee
2 tbsp brown sugar (adjust to taste)
1.5 tbsp milk powder (optional)
.
1. Soak finely chopped dates in 1/4 cup water till you are grating the squash. This step can be omitted if you are using the any soft dates like medjool etc.
2. Heat 2tbsp ghee.
3. Add grated squash and saute for 2-3 minutes.
4. Cover and cook for 5 minutes. Keep an eye on it, it gets cooked very fast.
5. Add the softened dates and sugar, stir well. Cook for a few minutes till everything comes together.
6. Add milk powder(if using) and walnut powder, stir well till incorporated.
7. Add 1tsp ghee along the edges of the pan and stir till it comes together.
8. Garnish with walnut halves and serve hot :)
Try this halwa once, it is rich in taste with that amazing dark color, you will enjoy the natural flavors.
This halwa tastes much better the next day, if possible do allow a day for the flavors to play their magic.
I'm not sure if my mind was playing games with me, but it tastes like Gajar ka Halwa after the flavors have developed for a couple of days :)


Notice the napkin under the plate? It is my favorite napkin with the lace made by my mom using shutle :)

.
Sending it over to Chandrika for AFAM-dates.

Click here for one more dish using Butternut Squash.

Thursday, November 8, 2007

H A P P Y D I W A L I - B a d a m No S e e r o aka A l m o n d H a l w a


I would like to wish all my friends and blog readers a very Happy and safe Diwali!
.
How about celebrating Diwali, the festival of lights with a lip smacking rich sweet :)
.
Badam No Seero, undoubtedly has to be one of my most favorite sweets. It is a popular sweet made during Diwali in Gujarati homes. It is quick to make, has plenty of almonds for the rich taste, can be made either with sugar or jaggery, what more can one ask for? ;)
Try it once and I assure you, your family and friends will be asking for seconds, meaning you gotta' make good quantities of this seera! Badam no seero is the Gujarati term for Badam Halwa!
.

Here is my version of Badam No Seero!
.
1/2 cup badam/almond powder
1/2 cup rava/sooji/semolina
2-3 tbsp ghee
1/2 tsp elaichi/cardamom powder
3 cups liquid - You can have any combination of milk and water, including all water or all milk
1 cup sugar - You can add sugar/jaggery as per your taste
(I do not like cloyingly sweet dishes, so i use just 1/2 cup sugar and jaggery mix which works out perfectly for me)
.
1. Heat ghee.
2. Add sooji and saute for about 15 minutes till it darkens a shade and you get the roasted aroma.
3. In the mean while heat the liquid, when it comes to a boil, add sugar/jaggery and let it melt.
4. Once the sooji is roasted, add almond powder and elaichi powder and saute for 2 minutes.
5. Add the syrup and let it get absorbed completely.
6. Cover and cook on low for a few minutes.
7. Your Badam Jo Seero is ready to be offered to the Gods and then devoured soon after :)

.
Notes:
Please do not use fine rava, that will just turn into a paste. I use sooji, the packet says sooji/upma rava/cream of wheat.
In the above pic, I've used 2 cups water + 1 cup milk.

No need to garnish the halwa with anything, well it has enough almonds, don't u think? ;)

There is a version of this halwa with 100% almonds, will post that as well, hopefully soon ;)
Enjoy.................
.


Monday, October 8, 2007

Dates and Pistachio Poli Adorns This Appetizing Thali for RCI

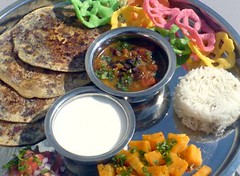
anti clock wise: Date Pistachio Poli, onion tomato salad, sweet potato subzi, rice, fryums/papad, kala chana gravy, home made curds!
.
.
I'm not able to participate in all the ongoing events as much as I would like to, but then Life happens............ ;)
.
Anyway, I decided to make this Dates and Pistachio Poli based on Viji's Poli recipe. When she mentioned that we can try sweet recipes from her archives for the RCI-Tamil Festival I was happy to try this out with my own variations and you can see the results were sweet :)
Poli's make a wonderful festival food and there are innumerable stuffings that can be catered to one's taste!
What is your favorite stuffing, please do let me know!!!
.


Dates and Pistachio Poli
.
I usually make all my stuffed Indian Breads (Parathas and Poli) using whole wheat flour/atta) and I did the same here. But if you are used making it with Maida like Viji, definitely go ahead and do it for the covering.
.
Covering:
2 cups whole wheat flour/Chapati atta
1 tsp oil
water to knead the dough.
.
Knead a smooth and pliable dough with the ingredients, cover and keep at least an hour.
.

Stuffing:
1 cup finely chopped dates
1/2 cup powdered pistachio
1/2 tsp cardamom/elaichi powder
.
Mash the dates well to form a soft mass.
If your dates are not too soft, they can be cooked in the microwave for a minute to soften.
Add pista powder and cardamom powder.
Believe me, it is better to make extra mix of this, you will love to eat this as is, I know I did :)
.
When ready to make the Poli, make equal size balls out of the dough and the stuffing.
Roll the dough to a puri(fried Indian bread) size and stuff with the date mix.
Seal well with the dough around it and roll to regular chapati size.
Heat a griddle and roast the poli like regular chapati, remove from the gas and smear with ghee.
Remember this is an important step to keep the poli soft and it imparts an unmistakable lovely aroma :)
.
Enjoy the Poli as a part of a meal as I did or just on it's own.

Notes:
The rolling part is not that difficult, specially if you are used to making stuffed parathas.
Make sure the stuffing is not too moist.
Try to make medium sized Poli's, less chance of the stuffing oozing out that way :)
Enjoy nutritious and tasty Date and Pistachio Poli!
.
This is my contribution to Viji's RCI-Tamil Festival. Thanks Viji.

Wednesday, September 19, 2007

Matthi Puri (Matthi translates to 'Sweet' in Kutchi language) Non Deep Fried version

We had totally different agendas!!!!
.
Me and Aunt 'R', that is!!
.
She was visiting from India. For her without a doubt it was making the rounds of Statue of Liberty, Empire State Building, Times Square & Atlantic City!
For me, without a doubt it was getting all the recipes from Aunt 'R', she being a fantastic cook :)
.
So, while she made lists of places to visit & shop, I made lists of recipes that I needed to get from her ;)
.
It did not end just at the recipes, I wanted her to demonstrate the cooking procedure so I could get it absolutely right :)
Keeping all my inhibitions aside, I kept pestering her ;)
Being a kind soul that she is, she not only obliged WILLINGLY, but was pleasantly surprised at my enthusiasm to learn new recipes.
Little did she know I had a food blog to cater to ;)


One of the recipes that she demonstrated for me was this amazing Matthi Puri.
If there ever was a food item I was told to choose to eat everyday, it would be this. It is so very rustic, so very tasty :)

It definitely does not fall in the easy to make categories and I was glad to learn it and then replicate it a few time there after :)
.
Matthi Puri is a sweet made out of Whole Wheat flour and Jaggery, just two ingredients!
This is usually made as a 'thando' for 'satam', a traditional festival where the gas/stove is not switched on for a day, it is given rest after the pooja and all the items made the previous day are savored. All the items for 'satam' are extremely delicious and everyone ends up eating more than their normal quota :) But you can most definitely make these anytime ;)
There is a similar punjabi delicacy called the sweet bhatura which uses similar ingredients, just that it is deep fried. Will give that recipe when I make it next time.
.

Here is the recipe for Matthi Puri
.
Soak a cup of grated/finely chopped jaggery in water.

Now comes the deciding factor. If you like things very sweet, just soak it in a little more than a cup of water. If you are like me and enjoy medium sweet, soak it in about 1.5/2 cups water.
This needs to soak couple of hours till all the jaggery melts to create a sweet solution. Break up jaggery lumps if any with your hands.

Now knead a dough with the jaggery solution and whole wheat flour (regular chapati aata).
The quantity of flour to be used is to get a very smooth and sticky dough.
Add 1tbsp oil and knead again.
IMP: Do not knead the dough to make it stiff, it has to be very loose.
Rest the dough for a minimum of 3 hrs.

When ready to make the Matthi Puri, dust your rolling surface, rolling pin with flour.
Make round-balls out of the dough, you might need a lot of flour for this as the dough is loose.
Roll into a thick puri sized circle. Keep dusting the board with flour and dredging the dough-balls in flour to make it pliable, soon you will get a hang of it. It is important to keep it thick so it does not dry out and get hard.

In my 12" skillet I make three matthi puri at a time.
Keep the flame on medium low. Once the underside gets cooked, flip the puri and continue cooking. Spread some oil on top and flip again. Press the puri well once in a while so that it gets cooked thoroughly. When it is fully cooked you will see a beautiful appetizing reddish brown color as in the pic :) It has to be slow cooked.

These Matthi Puri stay good for a long time(theoretically) and also make for an ideal travelling goodies!! In practice, they will be devoured the day they are made :)
Do try these once, you are sure to like them.
The dough making is a bit involved process, so try with a small quantity to start with.
Enjoy.......
This is my contribution to Hima's What's Your Favorite Snack Event!

Thursday, September 6, 2007

Peach Apricot Galette with Walnut Paste and Creme Fraiche AND some relaxing times....

Not once!

Not Twice!!

But Thrice!!!

Yes three is the number of times I broke the golden rule of baking, no peeking while baking :)
I had to, the aroma from the oven was too irresistible not to take in all the aroma possible ;)
In my defense have to say, did not make any difference to the baking at all ;)

Regular readers to my blog know about my liking for peaches and here is one delicacy made with peaches.

Peach Apricot Galette with Walnut Paste AND Creme Fraiche!


1 puff pastry sheet thawed
1/2 cup walnuts
1/2 cup sugar
2 peaches sliced
2 apricots sliced (If you can't find fresh apricot, soak dried apricot and use OR use only peaches)
2 tsp sugar

Creme Fraiche (optional)
1 cup creme fraiche
4 tbsp sugar

Preheat the oven to 425 degrees F.

Grind walnuts with sugar to a paste.

Unfold the pastry on a floured surface. Core about 1/4 inch from the border and fold the border over to form an edge.

Spread the walnut paste on the sheet.

Arrange peach and apricot slices over the paste in alternating layers or as you desire. Sprinkle the sugar over it.

Bake for 20 min till edges are golden brown.

To make the creme fraiche garnish just blend creme fraiche with sugar and serve with the Galette!
Can be served without the creme fraiche as well, tastes equally good!

Enjoy a delicious slice of this Galette as a dessert or just as a gorgeous snack with your afternoon tea or coffee, like I did :)
Recipe adapted from here, I did not find the need to add the egg.

This is my entry to sweet Mansi's AFAM-Peach.
.
.
.

It's good to be back after a mini break :)
Here are some pictures from my trip to Canada this past long weekend! The weather was sweeeeet, could not have been better!!!

SwamiNarayan Temple, Toronto with beautiful carvings inside and out!


Downtown Toronto Skyline as seen from Lake Ontario! You can see the Rogers Centre/ Skydome & CN Tower in the centre!


The Majestic Niagara Falls! Could not help but stop by both the times :) What a beauty, get goose bumps every single time!!
.
.


On another note, Congratulations to Federer on cruising into the semis'. Always A Class Act, the Perfect Gentleman, inspite of the crowds not being with him. What a thrill to watch him play!!
Here's wishing Federer All the Very Best for the championship and record breaking Grand Slams ever!!!!!!!
Update: 9/9/07 Congratulations to Federer on winning the US Open for the fourth straight time!!!! I'm thrilled to be able to watch him play such beautiful tennis! May you win many more........

Friday, August 24, 2007

Rice Pudding with Peach Sauce AND Jeera(cumin) Baby Alu(potato) Fry

I tread the produce section a bit cautiously!


I know you are wondering Why? Let me tell you :)
I have to do so, lest I come home with a Pluot or a Plucot in lieu of something else that I had in mind!


Pluot, it seems is a cross between a plum and an apricot, half plum half apricot said the label. It is called a plucot if the percentage of apricot is higher!!!!!!!!


The first time I saw this, I spent a good 5 minutes staring at the pluot, weirder combinations crossing my mind :) even got a few glances from the people around! Maybe I'm not 'THAT' open minded ;)


So if you ever come across a situation wherein you cannot decide between a plum or an apricot, Pluot can come to your rescue....LOL!!!!!


Still unsure why do I need to eat 'Y' if I feel like a 'X' ??
A lil' extravagant, aren't we ;)
.
Anyway, these hybrid sorts do not tempt my fancy, in fact, I'm a little wary of them!!
I like my plum to be a plum and my peach to be a peach :) I'm a simpleton you know .... ;)


Speaking of which, that I'm obsessed about Peaches is an understatement! I am as crazy about them as some folks are about Mango.
Nope it is not a comparison, just an observation :)


Almost get the withdrawal symptoms when the season is ending, such is my fondness for these beauties of a fruit !!!


Most of the times it is enjoyed as is, but I do make a few dishes out of it and
Rice Pudding with Peach Sauce is one of them! I do try to avoid putting too much sugar or butter into the preparation, that would take away from the taste of the lovely peaches.
Please do let me know of any concoctions that you make, using peach, will appreciate it. You can leave a comment with the same :)
.
2 heaped tbsp rice, washed & soaked for 15 minutes
2.5 cups milk
sugar as per taste
2 peaches
1 tsp lime/lemon juice.
.
1. Bring the milk to boil in a thick bottom saucepan.
2. Drain water from the rice and crush lightly with your hands. If you are making a huge quantity, you can pulse it in the mixer for a few turns till the rice breaks, not to be made into a paste.
3. Add crushed rice to the boiling milk and cook till the rice is done.
4. Add sugar as per taste, stir a few minutes and take off from fire, your basic rice pudding is ready. Cool in the refrigerator, will thicken a lot on cooling.
5. For the Peach sauce: De-skin the peaches and chop into pieces.
Sprinkle sugar(depending upon the tartness of the peaches) and 4/5 drops of lime juice. Let rest for 10/15 minutes. Blend to form a puree OR if you like some chunks in the sauce, just mash coarsely with a fork. Chill. I've displayed both the variations.
6. To serve:
Add a few tablespoons of the pudding into decorative bowls. Top with chilled peach sauce.
Indulge your senses with a Peachy Rice Pudding!This goes to Sharmi for JFI-Rice
.
.

.

And now over to one of my most loved vegetables ever - Presenting Mr. Potato/Alooooooo
.
An Ode to the spud!!!!!


How sweet and tasty art thou!
You blend so well with one and all!
You are the saviour of all vegeterians, when they travel outside their comfort zones!
You are wrongly accused, yet you take it all in your stride!
Well knowing it is not you, but your accomplices Mr. Cream & Mr. Butter who are to blame!
You nourish us with all the vitamins and minerals we need, so selflessly!
Oh! Mr. Potato, what would we do without you!!!!!!
.
WOOPS! got a bit teary eyed there, for my dear potato ;)
.


Jeera Baby Alu Fry
.
8 baby alu
1 tsp jeera(cumin) seeds
1 tbsp jeera, freshly roasted and crushed
1/2 tsp chili powder
1.5 tbsp oil
.
1. Par boil baby alu. I microwave it for 6 minutes.
2. Peel.
3. Heat oil and pan fry the potato till it gets a crispy exterior, remove and keep aside.
4. In the same oil add cumin seeds, splutter. Add hing(asafoetida), crushed jeera, chili powder and immediately add the potatoes. Add salt and let cook for a few minutes till the flavors blend.
5. Garnish with chopped coriander leaves.
6. Simple and tasty Jeera Baby Alu Fry is ready to be savored as an appetizer or a side dish.
.


My contribution to the Think Spice Think Cumin event hosted by Sunita.

Tuesday, August 21, 2007

Kesaria (A Saffron flavored sweet delicacy) AND Many Thanks Are In Order...AND Independence Day Parade Pics

That's me, enjoying a hot cup of my favorite lemon grass tea along with buttery crisp Shrewsbury Biscuits and Bakarwadi straight from my beloved bakery, back home :)

OOPS! forgot to upload my picture, so that makes it just the tea tray with the goodies ;) .......
.

No nonsense, Real biscuits mind you! Not low fat, not fat free, not sodium free, no substituting butter with water (sheesh! is that even possible? ) :) Suffice to say, these are not your flax seed cookies....LOL, they are the real McCoy :)
All thanks, courtesy The Cooker! And here's to The Cooker for taking me along for a walk down memory lane :)


Many Many Thanks to Sweet Sia, Archana, Laavanya, Prema & Athika for these beautiful awards!
Thank You Ladies for these cute buttons!


All the bloggers who take time out of their busy schedule to click pictures, post recipes and encourage others with their comments definitely ROCK, in my dictionary, and you know that!
A big Thank You to each & every blogger who takes the time to comment on my posts, makes me smile :)
.
Keeping in the tradition of passing these on, I would like to pass the Rockin' Girl Blogger Award to:

Aarti - Aarti's Corner
Priyanka - Lajawaab
Sukanya - Hot & Sweet Bowl
Ramya - Mane Adige
Kribha - En Samayal Pakkam
Pravs - Simply Spicy
Mytheree - Try This Recipe
Lakshmi K - Veggie Cuisine
Madhavi - Veggie World
Saju - Chachi's Kitchen
Raaga - The Singing Chef
Anusha - Talimpu
Lata - La Gourmet Chef
Shilpa - Aayi's Recipes
Madhu - Ruchii
Swapna Susarla - Tastes From My Kitchen


I would like to pass on the Schmooze Award to:
Archana - Tried & Tested Recipes
Asha - Foodies Hope
Sig - Live To Eat
Sia - Spice Corner
Trupti - The Spice Who Loved Me
Kajal - Kajal Dreams
Tee - Bhaatukli
Musicals Kitchen
Coffee - The Spice Cafe
Bee - Jugalbandi
Laavanya - Cookery Corner
Prema - My Cookbook
The Cooker
Latha - Masala Magic
.
I would also like to Thank Bureka Boy for not only guiding me to buy a grinder but also finding a great deal on the web for the same, is that cool or what! Thank You Bureka Boy! You Rock!
.

Just realized that I do not have very many sweet dishes on my blog, so thought of posting one of my favorite, quick to make desserts.
Kesaria


4 cups milk
1 lime/lemon
pinch kesar(saffron)
1-2 tbsp sugar
2 pinches elaichi(cardamom) powder
.

1. Heat 3 cups of milk, bring to a boil.
Note: Whole milk gives a thicker texture to the sweet, but 2% works well too, here I've used 2%.

2. Add juice of half a lime and stir. Let curdle. Add more lime juice if the milk does not curdle. Let rest for 5 minutes.

3. Add half portion of kesar into the hot mix.

4. Drain the whey and collect the chenna into a bowl. The mix must be moist, do not strain all the whey like in paneer.

5. Add the remaining cup of milk, sugar, kesar & elaichi powder and blend in a mixer.

6. Add into individual bowls and refrigerate for 4/5 hours till set. Whole Milk sets very well.

7. Enjoy a delicious chenna based light dessert!

Recipe adapted from here.


Here are some pictures from the 60th Independence day parade held on Sunday the 19th August, in one of my favorite cities, NYC!


Enjoy.....